TeeMerchant setup
Create pools, authorize upstream accounts and publish models.
Already have upstream accounts? Manage authorization and account pools locally, and let Router handle model requests.
Authorize upstream accounts →TeeMerchant→ Verify and sync with Router → Publish available models
1
Start the workspace, register an identity and connect
- From TeeMerchant Releases ↗ download the package for your operating system. On Windows, extract it and run
teemerchant.exe; on Linux x64, use./teemerchantfrom the release package. Linux requires glibc 2.36 or newer. - In On the same computer , open a browser at
http://127.0.0.1:8910and go to Account & Connection . Click Register New ID or select an existing local ID. - Check the platform address
https://teerouter.org, your actual Router HTTPS address, and the matching TDX / SNP policy files. Follow the same policy-selection guidance as for TeeProxy . - Save the connection settings. The workspace starts verification and connection. Follow the activation prompts; if it shows Activating , wait for platform synchronization and check the status. Confirm that Router is connected before adding accounts.
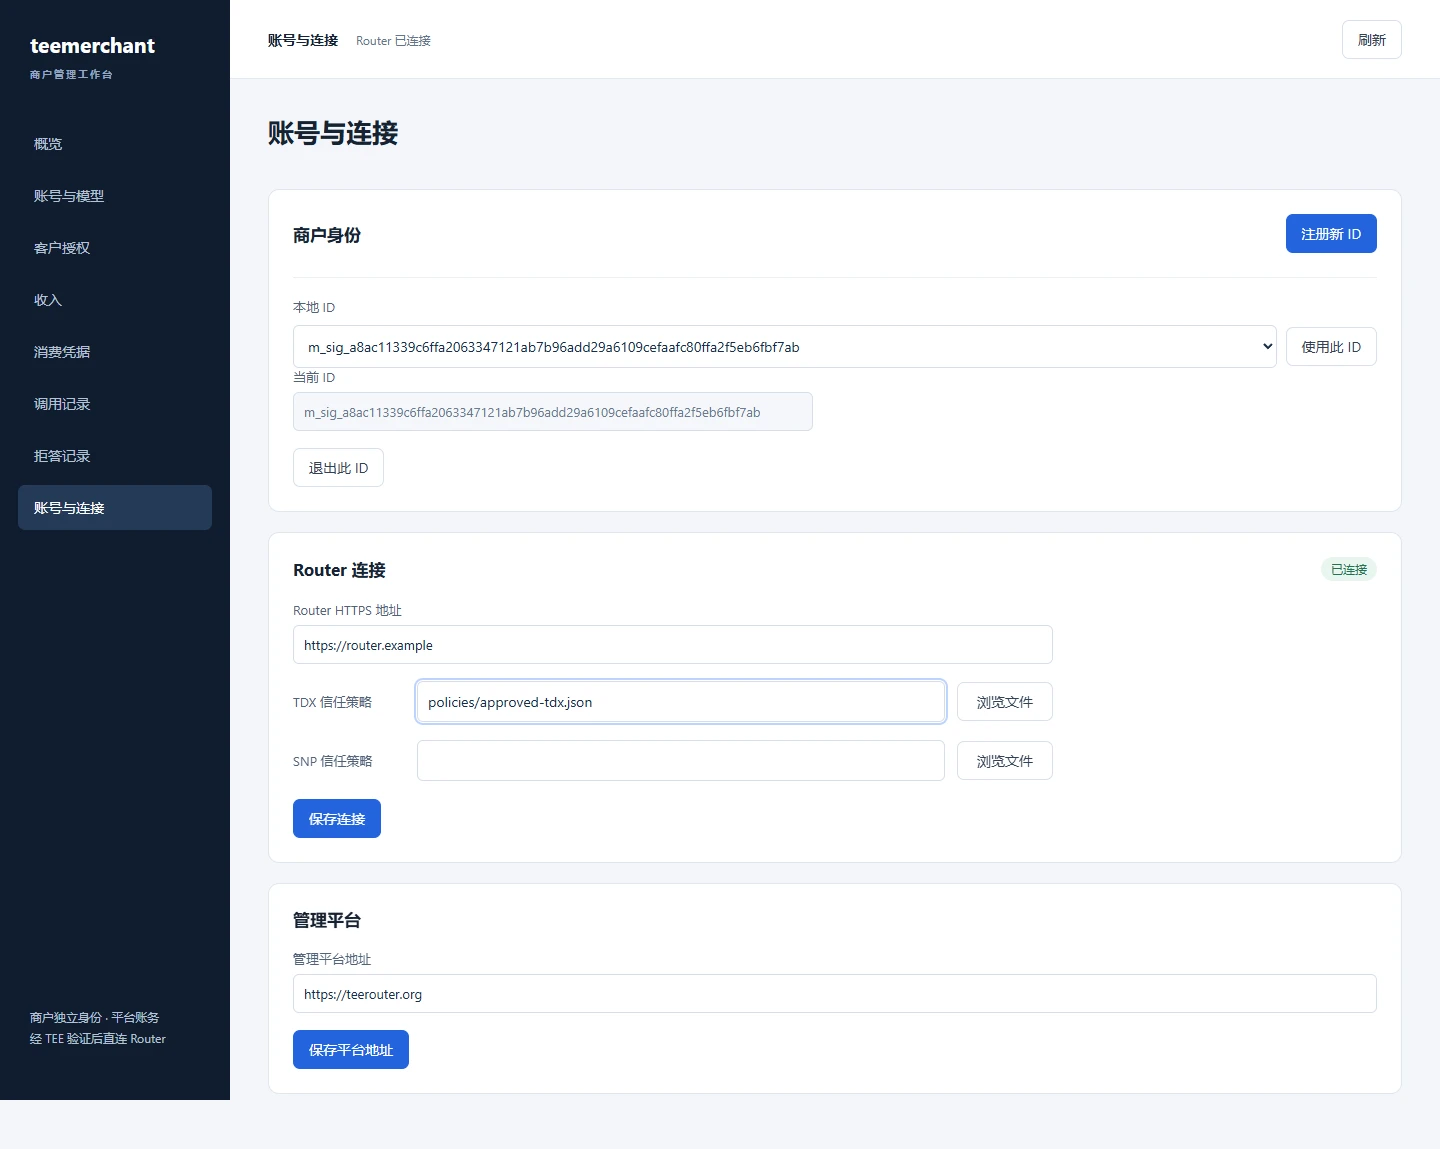
The workspace is for local access. Identity and authorization data stay on your machine. Keep the complete data directory and its decryption environment; a merchant ID is not a login password, and local key files should not be uploaded.
2
Create a pool and set its provider and multiplier
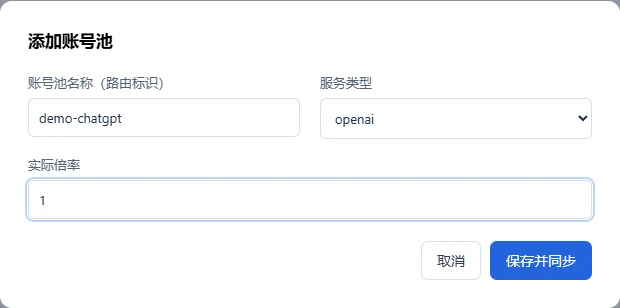
- Open Accounts & Models , then click Add Account Pool .
- Enter a pool name, such as
demo-chatgpt. Use letters, digits, underscores, dots or hyphens, and choose the actual provider: ChatGPT / Claude / Grok. - Set the public multiplier. 1× means 1× the model's base price. Set it according to your costs and save. Pool names and providers cannot be edited directly afterward; multipliers can be adjusted.
3
Authorize an upstream account, test it and sync
- Select the pool you just created , then click Add Account ; do not stay in the all-accounts view.
- Set the account ID and configure its network proxy . Follow the formats accepted by the interface, including HTTP, HTTPS, SOCKS5H or VLESS. This is the upstream network egress, not the website address.
- Select OAuth Authorization or JSON Import . For ChatGPT, follow the Device Code Authorization instructions and sign in on the official page. For Claude or Grok, provide the authorization code or full callback URL requested by the current dialog. JSON imports must follow the displayed format and use credentials you are authorized to use.
- For automatic renewal, enable Merchant Service Auto-renewal and keep the service running. Long-lived renewal credentials remain on the merchant's machine. Router receives the access token and other fields needed to serve requests.
- Click Test Connection , and once it succeeds, click Save & Sync . Testing checks credentials and the official model catalog without generating a model response. Check the account status and synchronization result afterward.
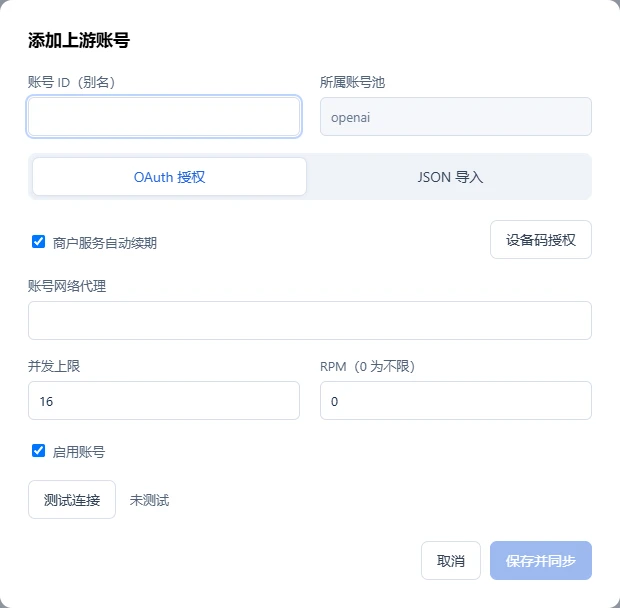
Saved locally and synchronized are different states. If the status is Saved locally · Waiting to sync, restore the Router connection and confirm synchronization succeeds. The account is not yet ready to serve users.
4
Publish models and check service status
- In the account pool directory, open Edit Available Models , select the models to offer, then click Save & Sync . Clearing the allowlist suspends all models in the pool.
- Confirm that Router is connected, the account is enabled and synchronized, and the required models are available. Check the pool in the website's model marketplace or TeeProxy. The public catalog has a synchronization delay; being listed does not guarantee capacity for every request.
- Keep the TeeMerchant service online and monitor token renewal and account health. Closing the browser page does not stop the service; exiting the service stops local renewal tasks.
- Use the merchant workspace to check activity, earnings and withdrawal status. Recorded earnings and settled funds are different states; check them separately.
Merchant setup complete Router connected · Account synchronized · Models published · Service running